How to update BIOS to be able to Install windows 11 on PC
Description:
ASUS EZ Flash 3 program allows you to easily update the BIOS version, save BIOS file to USB flash drive. You can update the UEFI BIOS tool of the motherboard.
Usage Scenario:
The current way for general users to update BIOS, usually by the Windows update Tool to update BIOS. But sometimes the operating system is poisoned, or there are a large number of resident programs and other unstable factors, may cause BIOS update to fail. Use ASUS EZ Flash 3 to update the BIOS version without entering the Windows operating system.
Table of Contents:
2-1. Update BIOS via USB flash drive
Step 1. Before updating the BIOS version, please back up all hard disk data.
Step 2. USB flash drives require a single sector in FAT 16/32 format, and 1GB or more is recommended.
Step 3. How to getting (BIOS)?
You can get the latest software, manuals, drivers and firmware at the ASUS Download Center.
If you need more information about ASUS Download Center, please refer to this link.
*How to check product model: https://www.asus.com/support/Article/565/
Operation method::
1. Download the latest BIOS file corresponding to your motherboard model from ASUS Download Center and save it in the USB flash drive.
Enter the model -> click on the driver and utility。
(Ex: ROG CROSSHAIR VII HERO)

2. Click Driver & Utility ->BIOS & FIRMWARE, select the required BIOS version and download it (it is recommended to use the latest version).
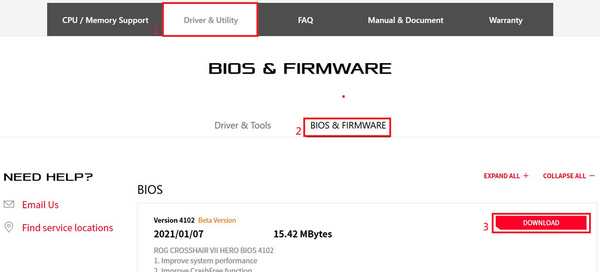
Step 4. After clicking the download button, save the BIOS to the USB flash drive, Then unzip (Windows 10 has its own unzip ZIP function), Check if there is a .CAP file in the root directory of the USB flash drive.

After unzip , a .CAP file will appear, this is the BIOS update file .

Step 5:Insert the USB flash drive into the USB port of the motherboard.
2.Update BIOS steps:
Please follow the steps as below to enter the BIOS
Step 1. After booting, when show ASUS LOGO, press the keyboard DEL key.

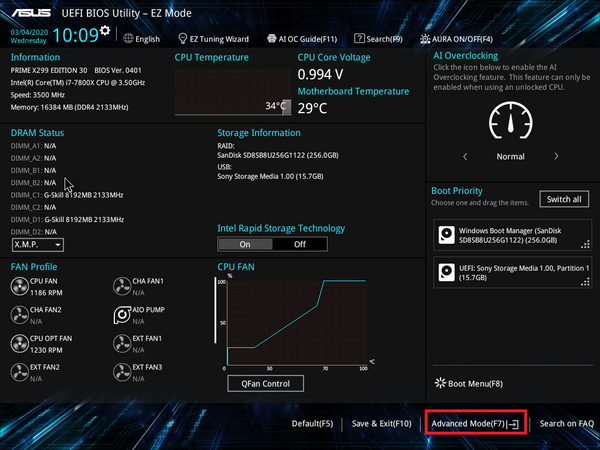
Step 2. When show the BIOS screen , press F7 or click Advance Mode with the mouse to enter the advanced mode.
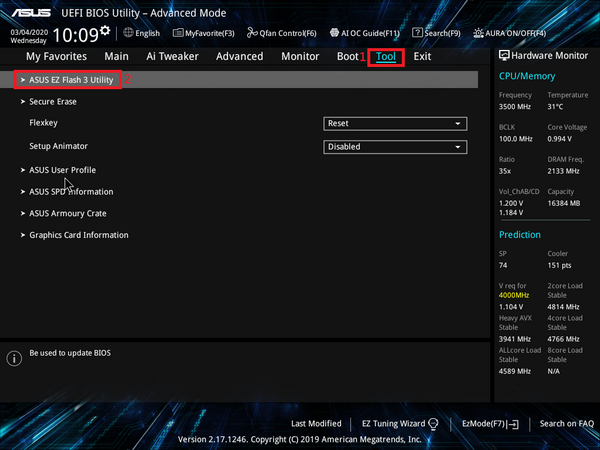
Step 3. Click the Tools page with the mouse, and then click ASUS EZ Flash 3 Utilities.
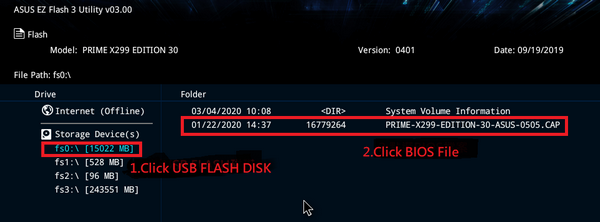
2-1. Update BIOS by USB flash drive
Click the disk the USB flash drive where is stored in the BIOS file, and click the BIOS file that you want to update.
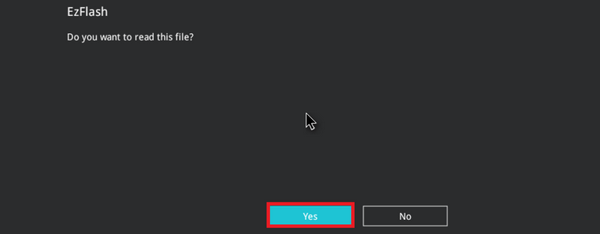
Click YES.
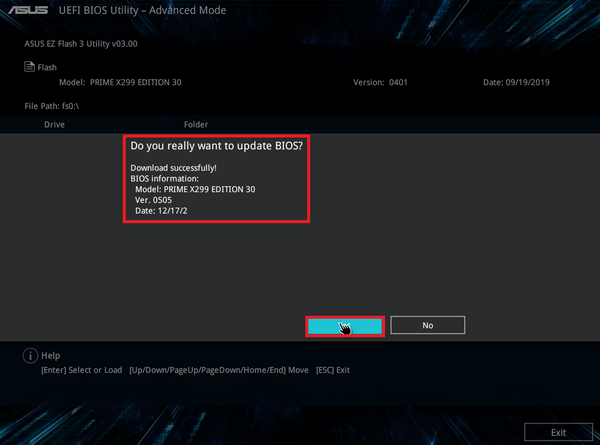
Confirm the BIOS information, click YES to start the update.
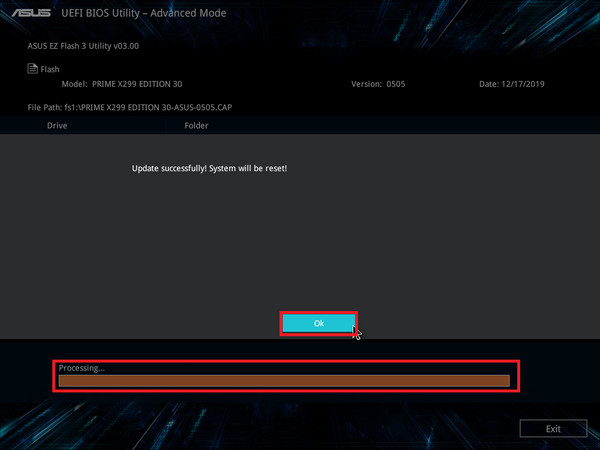
When the progress bar is completed, then show OK button, click it and it will reboot to complete the update.
Notice:1. This function only supports single-sector USB flash drives in FAT16/32 format.
2. When updating the BIOS, do not shut down or reset the system to avoid system boot failure.
3.Q &A
Q1: How to confirm whether my motherboard support ASUS EZ Flash 3?
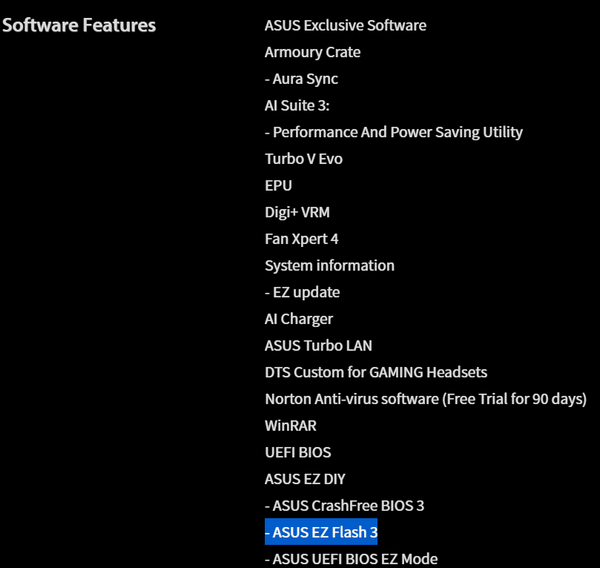
A1:ASUS EZ Flash 3 only applicable to UEFI BIOS motherboards with built-in ASUS EZ flash 3, you can confirm the product specifications from the official website.
On the product introduction page, click on product specifications.

You can check whether there is support in the Software Features.
Q2: After updating the BIOS, the system may become unstable or crash. What should I do?
A2:After updating the BIOS, it is recommended to follow the steps below to restore the BIOS default settings, to avoid system unstable caused by incorrect BIOS setting.
Please refer to the following steps:
1:Please enter the BIOS again and press the DEL key on the ASUS Logo.

On the BIOS screen, press F5 key.
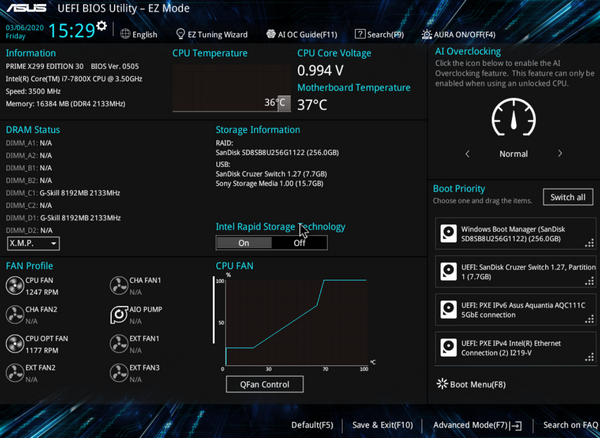
The following screen appears, click OK.
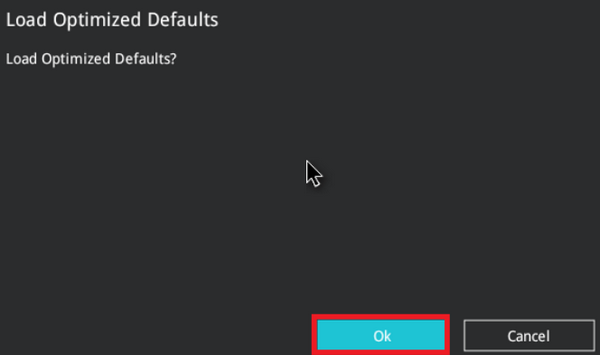
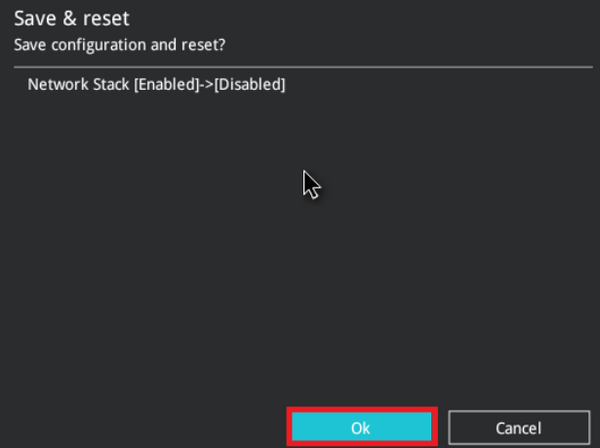
2. The following screen appears, click OK, Then the system restarts, you can restore the BIOS default settings .
Q3:How to make a FAT16 / 32 format USB flash drive?
A3: Please refer to the following steps:
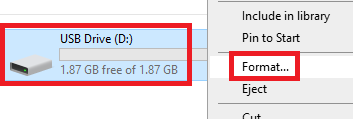
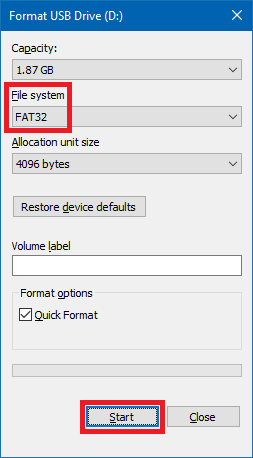
1. Format the USB flash drive. On the USB flash drive, right-click and select Format FAT16 / 32. *Formatting will delete all data in the USB flash drive.
2. File system format, select FAT32, and then click start.
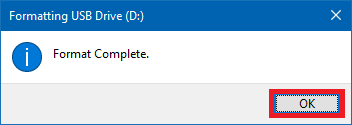
3. Formatting is complete.
Related Articles
How to install Windows from USB / DVD
(Image: © TechRadar) Looking to figure out how to install Windows 10 via USB or DVD? Well, you’ve come to the right spot. Windows 10 has been around for a while now, with Microsoft bringing in a number of welcome improvements to the table. And, if ...How to install Microsoft Windows 11 on VirtualBox!
The following step-by-step guide shows how to install Microsoft Windows 11 (latest Insider Preview build 22463.1000) on top of VirtualBox 6.1; this guide has been tested and verified on both macOS as well as Linux hosts. This is to address the ...How to re-set your BIOS to Dream PC Defaults
If you are having issues with crashes in Windows, sometimes it is good to go back to its roots with the default BIOS set up we place in from factory. Simply resetting the BIOS is also a way to get a crashing machine back to normality but you are ...How to enter UEFI (BIOS) on Windows 10 PCs
If you need to change the UEFI (BIOS) settings of your computer, in this guide, we'll show you two ways to perform this task on Windows 10. Windows 10 enter BIOS option (Image credit: Windows Central) On Computers, the Basic Input Output System ...How to reload Windows using usb media
article link: https://www.microsoft.com/en-au/software-download/windows10 video sample: https://www.youtube.com/watch?v=OtHZueEZe9s Using the tool to create installation media (USB flash drive, DVD, or ISO file) to install Windows 10 on a different ...