How to format your secondary hard disk in Windows
If you’re installing a new hard drive, or need to wipe your drive clean for that “fresh” feeling, you’ll end up formatting your drive.
Formatting will check the drive for errors, and prepare it for use. If a drive has data on it, formatting the drive will remove all of the pointers to your files.
Traditional, magnetic-platter hard drives as well as solid-state drives can be formatted.
Before you begin, be sure to back up important files on the disk before you format.
Use Disk Management
To partition and format your drive, you can use Windows’ built-in tool called Disk Management.

In Windows 10, click Start. Next, right-click the start button
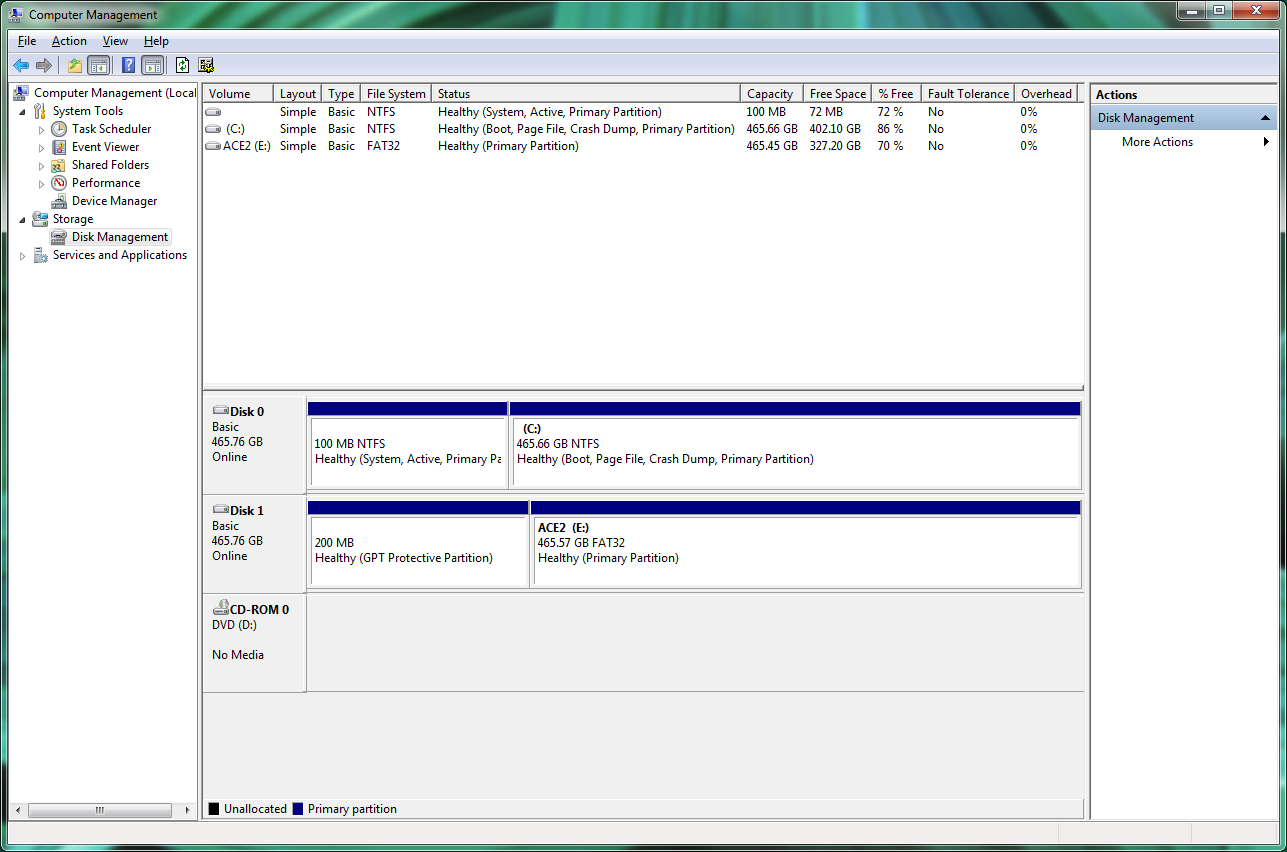
Then click “Disk Management” - a window will open.
A list of all connected disk drives is displayed in the centre. Unpartitioned drives appear with solid black bars and the label “Unallocated.” Partitioned drives appear with solid blue bars and a drive letter.
Partitioning your drive
To format an internal or external hard drive to use for backup or additional storage, the drive needs to be partitioned. Partitioning divides your drive into sections, but you can choose to simply have one partition (a single section encompassing the entire drive).
If your drive isn’t partitioned, follow these instructions to partition it. Otherwise, skip down to the next section.
Right-click the black bar or the unallocated white space below it and select New Simple Volume… Don’t be dissuaded by the word, “Volume.” It’s just another term for “partition”. Click Next.
To create a single, whole-drive partition, make sure the “Simple volume size in MB” value is the same as the “Maximum disk space in MB” value. Click Next.
Assign a drive letter of your choice. Click Next.
Select Format this volume. For File System, choose NTFS if you’ll be using the drive only with Windows machines. If you will be sharing the information on the drive with Macs, choose exFAT. Keep Allocation unit size at Default. Choose a name for the partition under Volume label. We advise you not to select Enable file and folder compression. You can however leave the "quick format" checked however to save a heap of time waiting for it to complete. Click Next.
Confirm your selections and click Finish.
Formatting your partitions
Once your drive is partitioned, each partition will have to be formatted with a filesystem. Luckily, the Disk Management utility makes this really easy.
Right-click the blue bar or the white space below it and select Format.
Choose a name for the partition under “Volume label.” For File System, choose NTFS if you’ll be using this drive only with Windows machines. Linux machines can read unencrypted NTFS partitions as well.
If you will be sharing the information on this drive with Macs, choose exFAT. Keep “Allocation unit size” at Default. Do not select Perform a quick format or Enable file and folder compression. Click OK.
Confirm your choices.
Modified post from original article by https://www.pcworld.com/article/248980/how-to-partition-and-format-your-hard-drive-in-windows.html
Related Articles
How to install Microsoft Windows 11 on VirtualBox!
The following step-by-step guide shows how to install Microsoft Windows 11 (latest Insider Preview build 22463.1000) on top of VirtualBox 6.1; this guide has been tested and verified on both macOS as well as Linux hosts. This is to address the ...How to Wipe Clean Your Boot Disk and Re-Install Windows Using The Windows 10 Boot USB
Firstly and most importantly, remove any other storage devices from your system - just leave the SSD/HDD you wish to Wipe Clean plugged in. Next, we'll boot into the Windows 10 USB you got with the PC. Select your language and on the next screen, ...How to see if your hard drive is dying with S.M.A.R.T. (SMART)
Hard drives use S.M.A.R.T. (Self-Monitoring, Analysis, and Reporting Technology) to gauge their own reliability and determine if they’re failing. You can view your hard drive’s S.M.A.R.T. data and see if it has started to develop problems. Hard ...How to install Windows from USB / DVD
(Image: © TechRadar) Looking to figure out how to install Windows 10 via USB or DVD? Well, you’ve come to the right spot. Windows 10 has been around for a while now, with Microsoft bringing in a number of welcome improvements to the table. And, if ...How to update BIOS to be able to Install windows 11 on PC
You Need to Update BIOS so that you can install Windows 11 on the PC. Description: ASUS EZ Flash 3 program allows you to easily update the BIOS version, save BIOS file to USB flash drive. You can update the UEFI BIOS tool of the motherboard. Usage ...