How to diagnose memory problems on Windows 10
Using these steps requires you to restart your computer, so make sure to save any files you may have open and close any running applications before proceeding. Here goes:
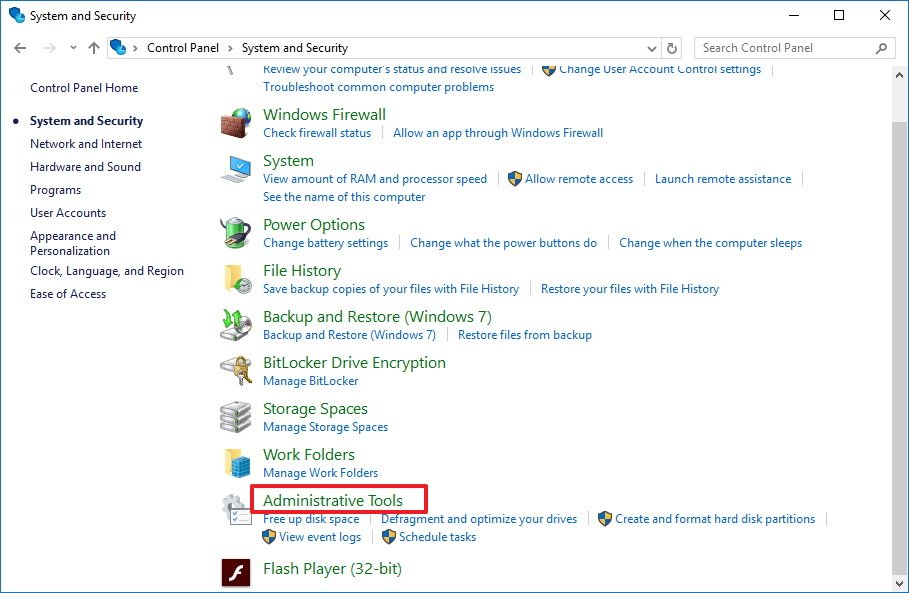
- Open Control Panel.
- Click on System and Security.
Click on Administrative Tools.

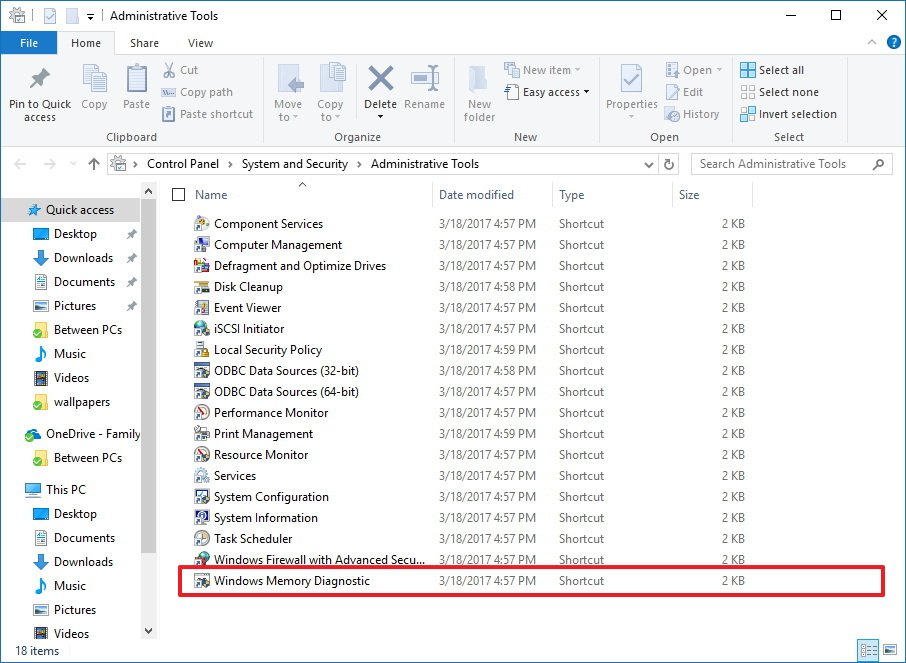
Double-click the Windows Memory Diagnostic shortcut.

- Quick tip: Alternatively, you can also use the Windows key + R keyboard shortcut, type mdsched.exe, and click OK to launch the tool.
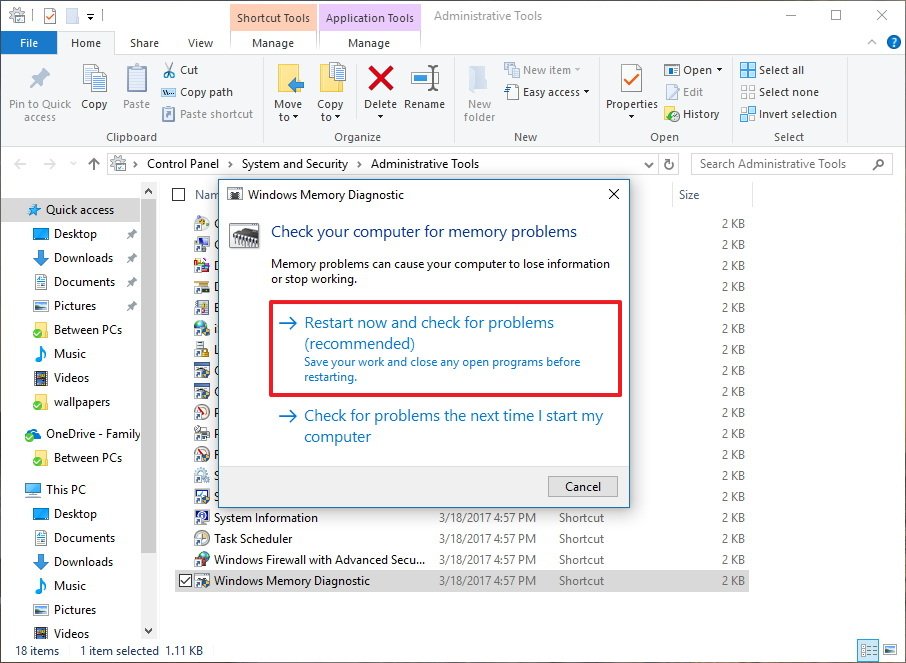
Click the Restart now and check problems option. (The tool also offers an option to schedule a test in the next reboot, if you can't afford to close your applications and restart immediately.)

Once your computer reboots, it will start in the Windows Memory Diagnostics environment, and the tests will kick in the Standard mode right away. In this mode, the tool will run all the scans available in the Basic mode, in addition to LRAND, Stride6 (cache enabled), CHCKR3, WMATS+, and WINVC tests.

You can simply let the Standard mode test your computer's memory, or you can also press the F1 key at any time to open the Windows Memory Diagnostic page to change the scan options.

On the options page, you can change the scan mode to Basic, which runs the MATS+, INVC, and SCHCKR (cache enabled) tests.
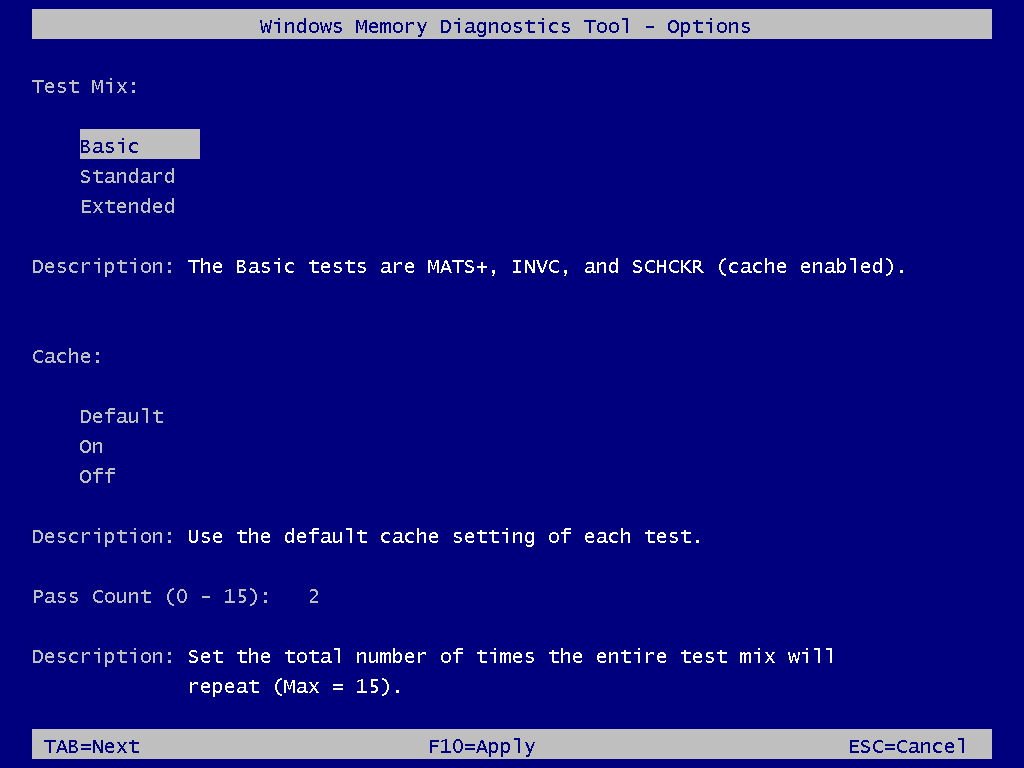
Or you can also select the Extended mode, which includes every test available using Standard mode, plus MATS+ (cache disabled), Stride38, WSCHCKR, WStride-6, CHCKR4, WCHCKR3, ERAND, Stride6 (cache disabled), and CHCKR8.
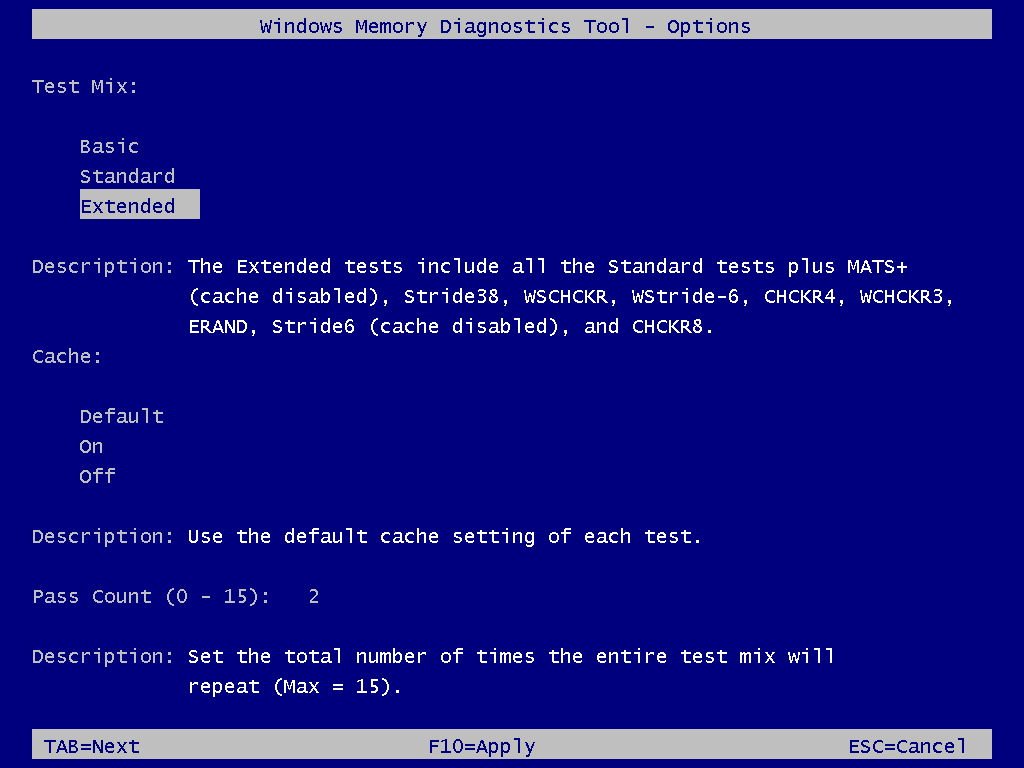
If necessary, you can navigate the different options using the TAB key to change cache settings. If you disable the cache, it'll allow the tool to access the data in RAM directly, which ensures a complete test. In addition, you can also set a number of times the scan will be repeated to test your system's memory modules.
After you're done selecting your options, just press the F10 key to go back to the main page, and the scan will restart automatically.
Checking test results
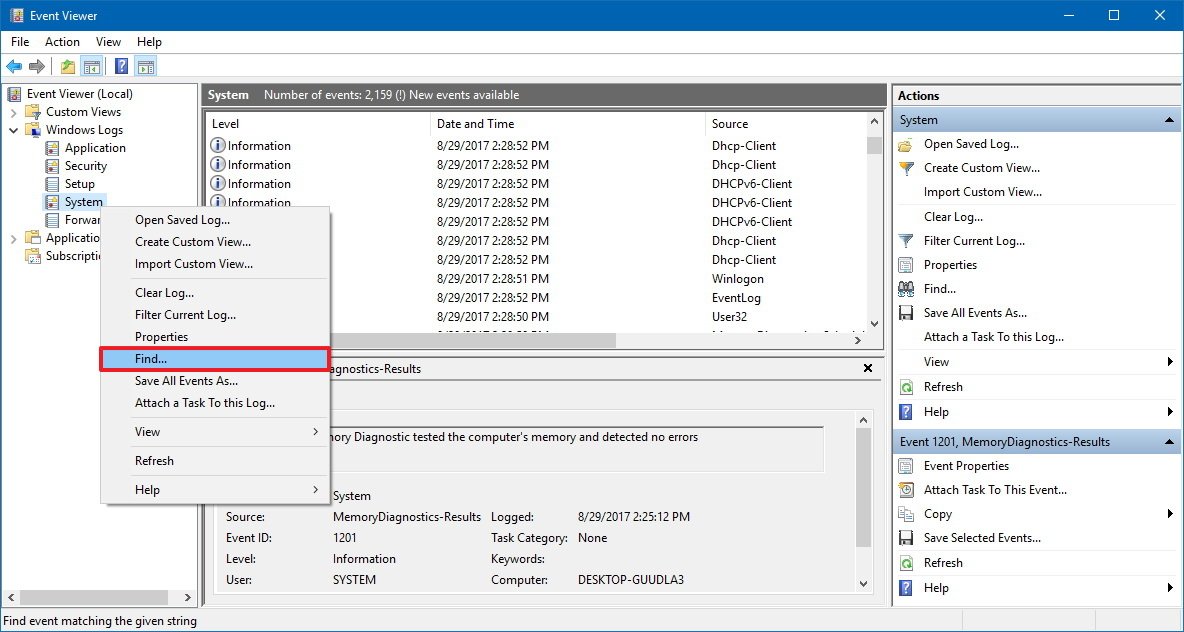
While you can see the status during the scan process, as soon as the test completes your computer will restart automatically, and you'll need to use the Event Viewer to see the test results to find out if you have a bad RAM module.
- Open Start.
- Search for eventvwr.exe and press Enter to open Event Viewer.
- Expand the Windows Logs folder.
Right-click System, and click on Find.

Type MemoryDiagnostics-Results, and click the Find Next button.

- Close the Find dialog.
On Event Viewer, double-click the MemoryDiagnostics-Results source, and see the message. If the result reads "The Windows Memory Diagnostic tested the computer's memory and detected no errors," then you can discard memory as the root of the problem.


If the result shows one or more errors, you can try running an extended memory test, and recheck the results. If you continue to see at least one error, one of the RAM modules probably has problems, and it may need to be replaced.
Sometimes, when the test fails, the tool will be able to indicate which module has the problem with the results. However, if it's unable to provide that information, you may need to remove and test each memory module until you find out the one that is faulty.
Although we're focusing this guide on Windows 10, the Windows Memory Diagnostic tool has been available for years, which means that you can also use it on previous versions, including Windows 8.1 and Windows 7.
For more help with memory or boot issues with your Dream PC hardware, please contact us with your order number to hand. We'd be happy to help you through any memory issues you are having.
Article source: https://www.windowscentral.com/how-check-your-pc-memory-problems-windows-10
Related Articles
How to install Microsoft Windows 11 on VirtualBox!
The following step-by-step guide shows how to install Microsoft Windows 11 (latest Insider Preview build 22463.1000) on top of VirtualBox 6.1; this guide has been tested and verified on both macOS as well as Linux hosts. This is to address the ...How to enter UEFI (BIOS) on Windows 10 PCs
If you need to change the UEFI (BIOS) settings of your computer, in this guide, we'll show you two ways to perform this task on Windows 10. Windows 10 enter BIOS option (Image credit: Windows Central) On Computers, the Basic Input Output System ...How to uninstall Microsoft UWP Apps from Powershell command prompt
There are many apps pre-installed in Windows that you didn't ask for, nor need. Not only that but they are all installed from the horrid Windows Store, not full desktop apps. Here is a quite a good list of commands we can use to uninstall them. ...How to reload Windows using usb media
article link: https://www.microsoft.com/en-au/software-download/windows10 video sample: https://www.youtube.com/watch?v=OtHZueEZe9s Using the tool to create installation media (USB flash drive, DVD, or ISO file) to install Windows 10 on a different ...How to Uninstall Applications in Windows 10
How to Uninstall Applications in Windows 10 Article source: Laptopmag Uninstalling unwanted programs is one of the most common and important tasks that all laptop and desktop users perform. However, if you're new to Windows 10, you may not know how ...