How to create/move your Steam Library
Today’s games are unapologetically massive. In the old days, game sizes were limited by their respective medium. With the advent of broadband internet and digital downloads, though, games have transcended physical mediums and grown exponentially in size, being limited only by hard drive space and bandwidth.
That is to say, there are plenty of reasons why users may need to shuffle their games between drives. Whether you need to allocate space on your C drive for the newest game or you’ve picked up a new external drive, there are a couple of ways to move installed games around in Steam, the world’s foremost digital PC gaming platform.
We’re going to tell you how to move one game, or relocate an entire Steam library, to another drive without any stress.
Create a New Steam Library
To create a new steam library, you’ll first need to set up a new directory for your Steam games, which is a straightforward process.
Step 1: If you haven’t already, install Steam. Next, open Steam. With the Steam client open, click “Steam” in the utmost left corner. Then, choose “settings” from the dropdown menu. That will launch a separate window.

Step 2: In this window, on the left-hand navigation pane, click “downloads.” Then, on the right-hand pane toward the top, click “Steam library folders.” The process will look like this:
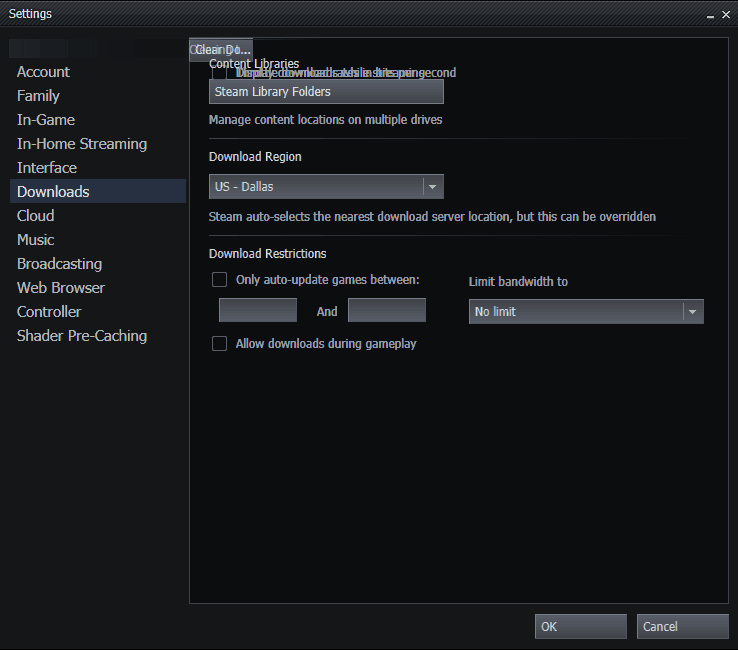
Step 3: From there, choose “add library folder,” then navigate to the corresponding drive and click “add new folder.” Give the directory whatever name you like. Once you’ve done that, click “select” to add it to your Steam library folders.

Moving Games to a New Library
Now that we’ve created a secondary library for games, you will want to move the game files to the new location.
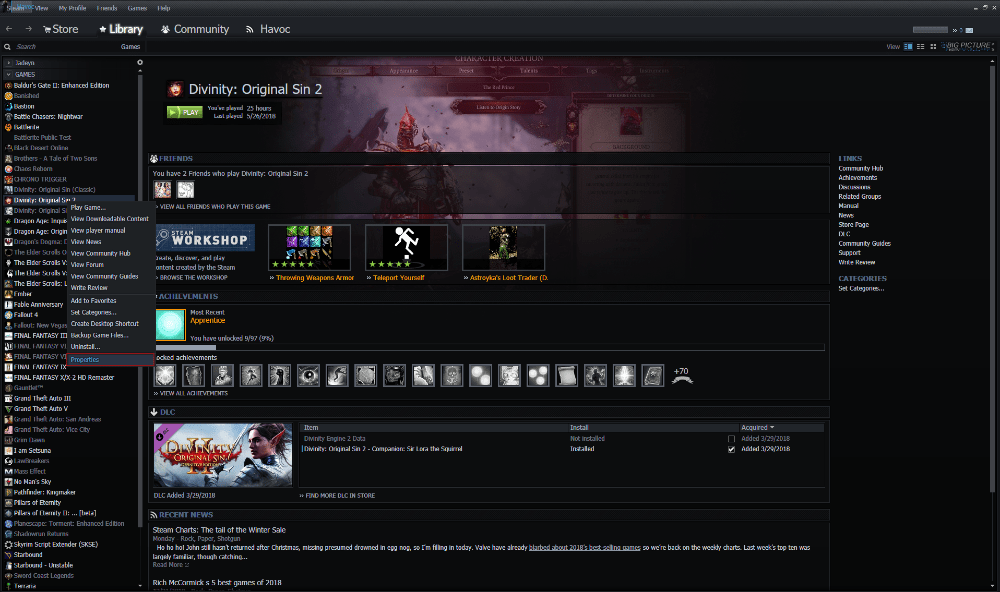
Step 1: Right-click an installed game and select “properties.”
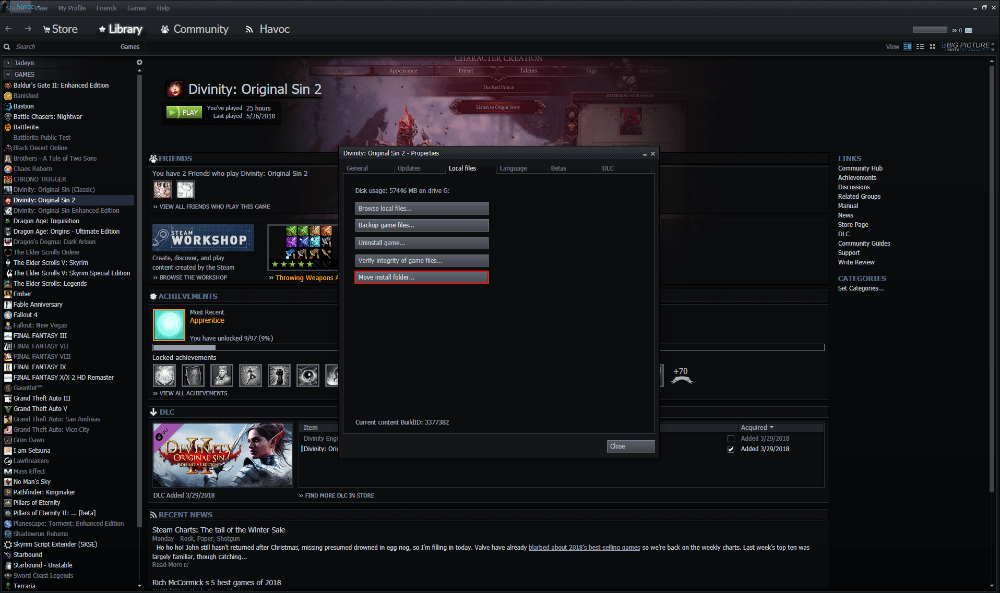
Step 2: From the pop-up menu, choose the “local files” tab. Go to the bottom of the list below the tab and select “move install folder.”
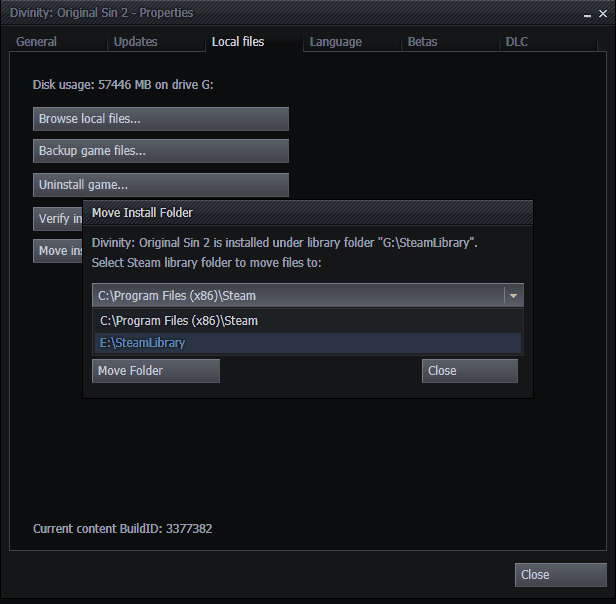
Step 3: A new window will prompt you to select a library to move the game to from a dropdown menu. Select the Steam library you created previously, then click “move folder.”
That’s it. Steam will move the game’s local files to the new directory, and you’ll free space for that new game or all those cat GIFs.
The process of moving Steam library folders to a different location used to be a lot more tedious. That’s because Steam didn’t have a baked-in feature for moving games without reinstalling them, so make sure you’re running the latest version of Steam to enjoy these quality of life features.
Moving a Library
We just covered moving Steam games individually, but maybe you want to move an entire library to a new drive. It’s quite easy to amass a swelling collection of installed games, especially if you fancy the unrepentant glut of Steam sales. Hey, it happens to the best of us. Whatever the case, moving Steam libraries is simple.
Before starting, we recommend making a backup of the Steam library folder you’re moving, in case things run afoul. You can create a copy to keep locally or use Steam’s backup feature.
Step 1: Create a Steam library folder following the instructions above, then close the Steam client.
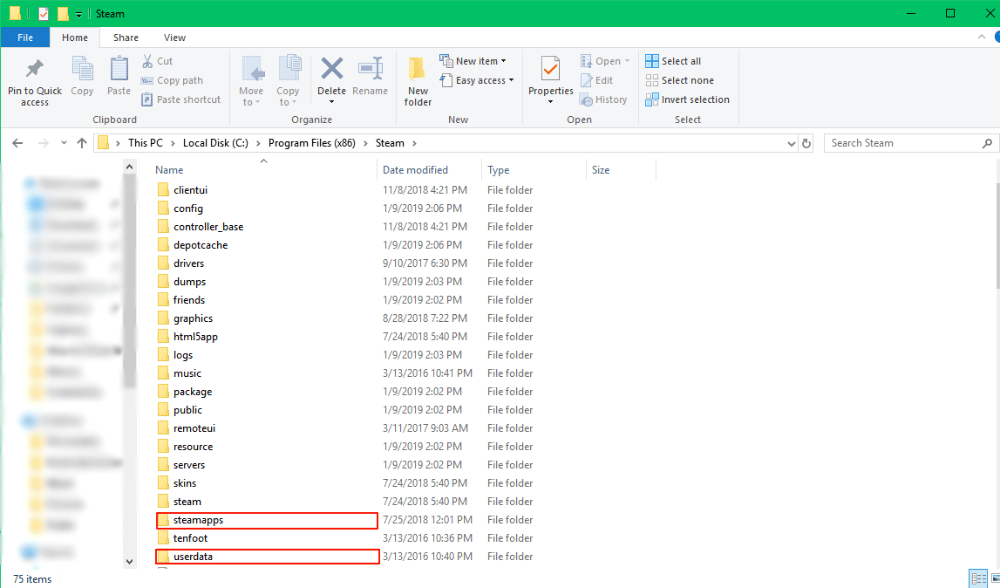
Step 2: Browse to the Steam installation folder to be moved. Once there, delete all files and folders except for “Steamapps” and “userdata.”
Step 3: Cut and paste the Steam library folder into the new path you created. For instance, it could be called E:\SteamLibrary
Step 4: Reopen Steam and log in, then point Steam to your new directory and verify game files if necessary. If you encounter issues, try uninstalling and reinstalling Steam. The Steam support page can also be helpful.
Steam and the Cloud
The Steam Cloud is great, and it makes us wonder how we survived the primitive age of gaming when cloud saves didn’t exist and save-files were limited to one machine or memory card.
Many people familiar with Steam likely know about Steam Cloud. It is cloud storage hosted by Steam that allows users to enable cloud saves, backup and restore games, store Steam user settings and the like. That said, not all Steam games support the feature, most notably older titles.
Final Thoughts
Those of you who have been using Steam since before 2017 probably remember the tedium of moving games between drives, and using symbolic links. Thankfully, moving Steam games and library folders is much easier these days, and hopefully we’ve demonstrated that.
When it comes to moving games in batches or moving library folders, Steam could be improved. Although, compared to rivals such as Origin and GOG Galaxy, there’s little to complain about.
Original article: https://www.cloudwards.net/how-to-move-steam-games/
Related Articles
How to change the location of your Documents in Windows 10
Whenever you save a new file in Windows 10, the Save As window defaults to whichever of your user folders–Documents, Music, Pictures, and so on–is appropriate to the file type. If you’d rather not save files on the C: drive, though, Windows lets you ...Fix Windows 10 Windows Live Mail Error Message Can't be Displayed
Note: Make sure you have backup the profile before doing anything to be sure. Navigate to: Computer\HKEY_CURRENT_USER\SOFTWARE\Microsoft\Windows Live Mail Create entry as shown in the video and name it as follows: RecreateFolderIndex ...How to Set Up Software RAID 1 on an Existing Linux Distribution
What is RAID? RAID stands for Redundant Array of Inexpensive Disks. RAID allows you to turn multiple physical hard drives into a single logical hard drive. There are many RAID levels such as RAID 0, RAID 1, RAID 5, RAID 10 etc. Here we will discuss ...How to Find Crash / Error Events In Windows 10 Event Viewer
To view Windows 10 crash logs, you can make use of the built-in tool Event Viewer, which keeps a log of application and system messages, errors, warnings, etc. You can follow the steps below to check Windows crash logs Windows 10 with Event Viewer. ...How to activate and install Norton AV on Windows
Go to my.Norton.com and sign in with your Norton account email address and password. If you don't have an account yet please create one and choose "I have a licence key". Insert the subscription licence key provided. Norton will ask you to insert ...